Dispatch Setup |
The Dispatch Setup is used to customize the appearance and functionality of Dispatch Center. The setup divided into three main tabs; Interface, Misc and Message Details. The Miscellaneous tab is used to select and define the interfaces used with other systems, such as onboard GPS systems, real time message communication, and display preferences for the Dispatch Center map. The Message Details tab is used to compose the format of the email messages sent to your drivers when using the Email Driver or Email Truck options. Also see Dispatch Center Setup & Security Video Tutorial and Related Topics.
Navigate To: Routing>Dispatch>Setup

The Interface tab contains the settings for customizing Dispatch Center User Interface, such as changing the grid appearance and behavior, button availability and route type limitations.
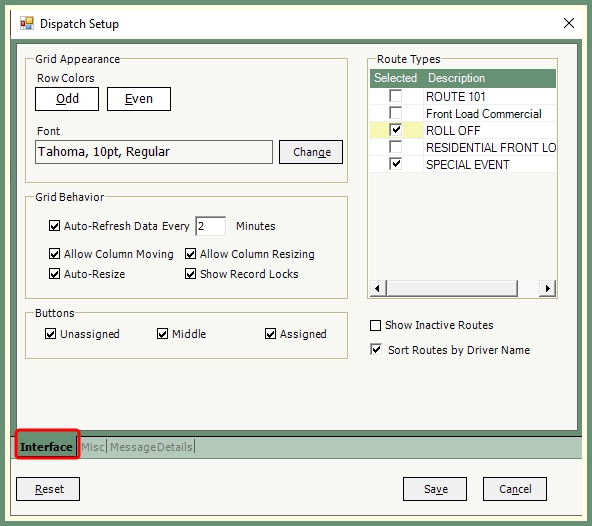
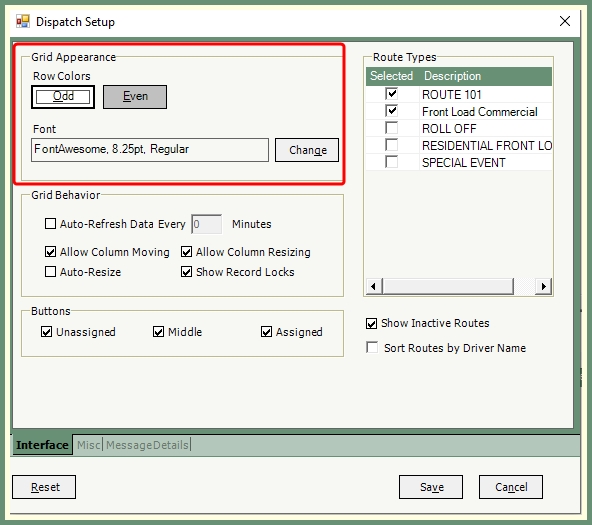
- To change Row Colors, click Odd and/or Even button.
- Select a color to be applied to the respective row.
- Click Change button to change the font, style, size, effects, color, etc...
- Click save to apply the grid appearance changes.
Auto-Refresh Data Every __ Minutes: Refreshes the grid data automatically based on the number of entered minutes.
Allow Column Moving: When enabled, the grid columns can be moved.
Auto-Resize: When enabled, the column sizes will be reset to their original sizes.
Allow Column Resizing: When enabled, the columns can be re-sized as preferred.
Show Record Locks: When enabled, the Record Lock column will be shown in the unassigned and assigned grids and include a lock symbol if the call is in use.
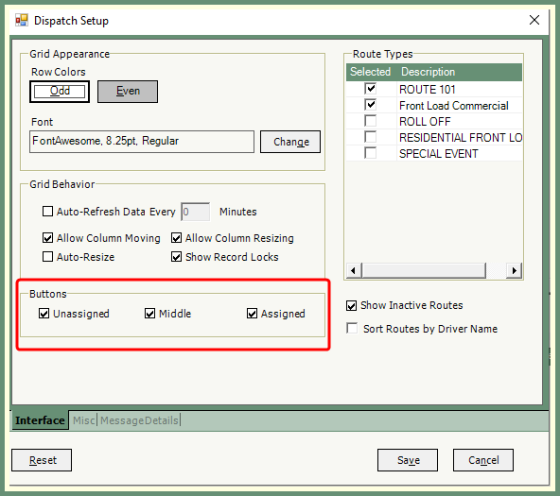
Unassigned: Displays or hides the Assign and Delete buttons from the Unassigned Calls grid .
Middle: Displays or hides the buttons between the Unassigned and Assigned grids.
Assigned: Displays or hides the Message, Unassign, Finish and Complete buttons from the Assigned grid.
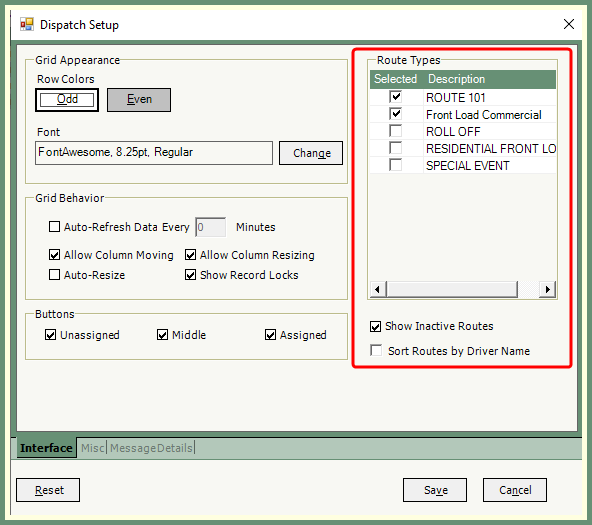
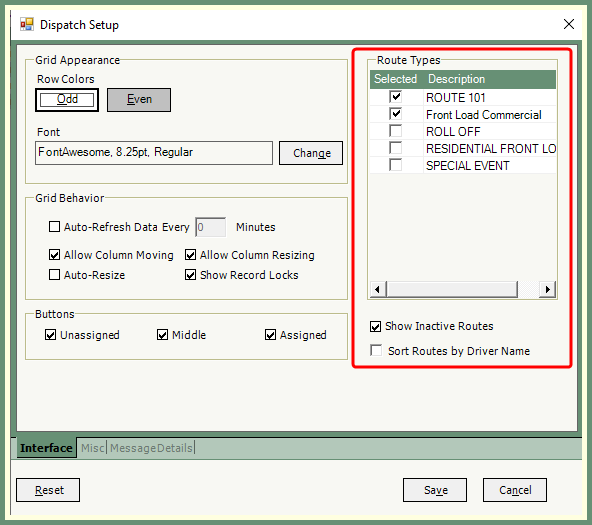
Route Types: Select or Deselect the Route Types to be included in the grids.
Show Inactive Routes: Includes inactive routes when enabled.
Sort Routes by Driver Name: Displays the calls sorted by driver name.
The Miscellaneous tab is used to select and define the interfaces such as GPS systems, message communication and display preferences for the Dispatch Center map.
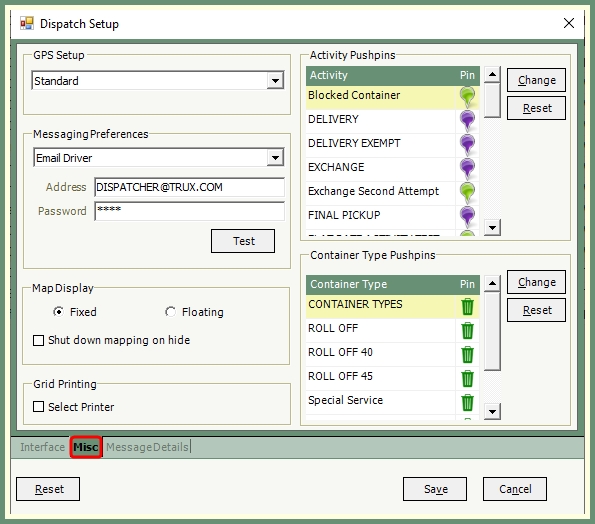
GPS Setup: The method used to interface the GPS System.
Standard: TRUX system GPS System. This is the default and typical selection.
Test: Used to test the GPS System.
No GPS: Used when GPS is not utilized.
Messaging Preferences: The method used to communicate with drivers from dispatch.
Email Driver: Sends messages from the dispatch email to the driver email address stored in the Driver/Helper Code Table.
Email Truck: Sends messages from the dispatch email to the email address stored in the Vehicle Code Table.
Standard:
No Messaging: When messaging drivers will not be used.
Map Display: Determines how dispatch center displays the map.
Fixed: Displays the map in a fixed location replacing the lower assigned grid.
Floating: Displays the map within it's own window and the lower assigned grid remains visible.
Shut down mapping on hide: Closes the map when hide button is clicked.
Grid Printing: Determines if TRUX will prompt for a printer when the Print button is selected.
Activity Pushpins: Specifies the pushpins to be displayed on the map for each activity.
- All active activities will display in the Activity grid with the current Pin.
- Select an Activity from the grid.
- Click Change and all available Pushpins will open in a Choose Pushpin window.
- Click on the Pushpin to be associated with the selected activity and click Select.
Container Type Pushpins:Specifies the pushpins to be displayed for each Container Type.
- All active container types will display in the Container Type grid with the current Pin.
- Select a container type from the grid.
- Click Change and all available Pushpins will open in a Choose Pushpin window.
- Click on the Pushpin to be associated with the container type and click Select.
The Message Details tab is used to compose the format of the email messages sent to your drivers when using the Email Driver or Email Truck options.
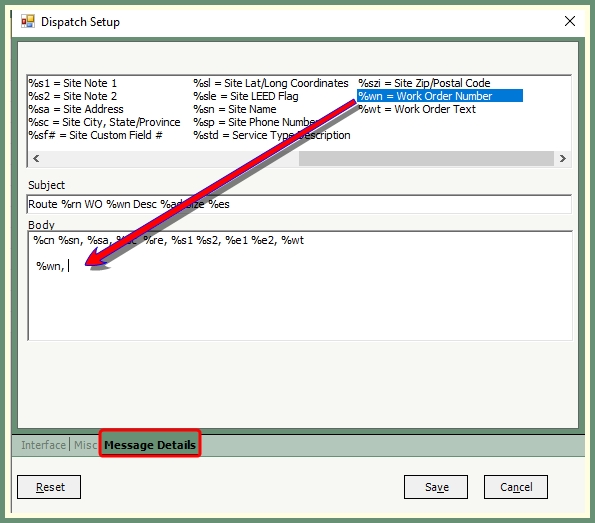
- Double click on a field from the top box of available fields.
- Add fields to the Subject and/or Body.
- Separate fields by a comma and click Save.
